


Windows
Server Update Services 3.0 Service Pack 2 (WSUS 3.0 SP2) provides a
comprehensive solution for managing updates to your network. So, rather than
having every computer in your organization download megabytes worth of updates
over the internet, you can configure a WSUS server to be the only
computer that downloads updates and than you configure every other
computer in your organization to use the WSUS server as the source of
update files.
WSUS 3.0 SP2 Server Software Prerequisites:
Microsoft Management Console 3.0
The Microsoft .NET Framework 2.0 or later versions
Microsoft Report Viewer Redistributable 2008
You must have one of the following supported databases installed:
◦ Microsoft SQL Server 2008 Express, Standard, or Enterprise Edition SQL Server 2005 SP2
◦ Windows Internal Database
Internet Information Services (IIS)
Install
IIS:
Install WSUS Server:
If you are running Windows 7 or Windows Server 2008 SP2, you can install WSUS 3.0 SP2 from Server Manager. If you are using server 2008, you need to download WsusSetup.exe first from Microsoft website. To download it click here.
Here I am using WsusSetup.exe for server 2008.
The WSUS Setup Wizard is launched from the WSUSSetup.exe file.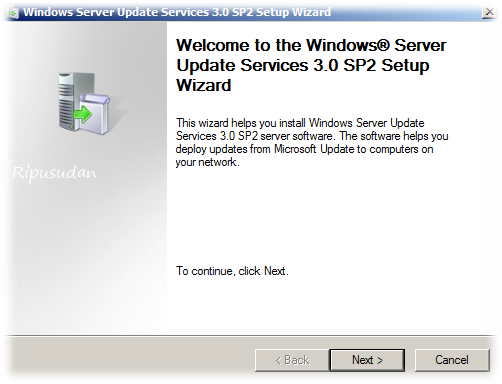
On the Welcome page of the Windows Server Update Services 3.0 Setup Wizard, click Next.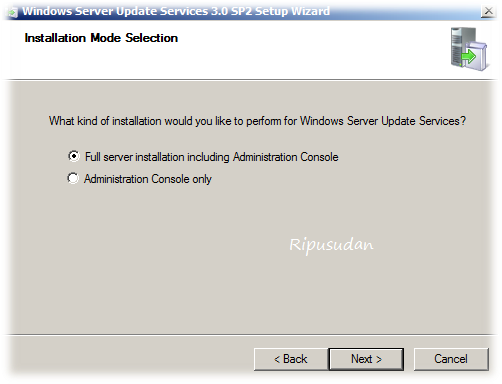
On the Installation Mode Selection page, select Full server installation including Administration Console.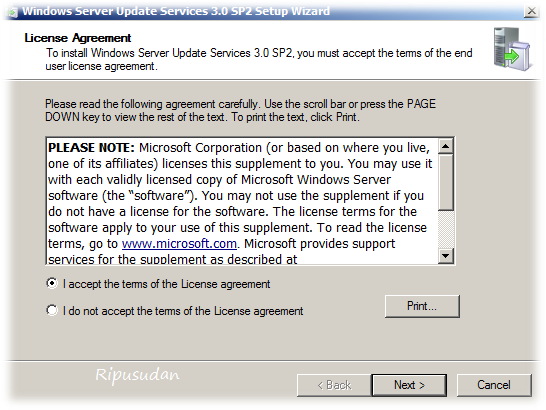
On the License Agreement page, read the terms of the license agreement, click I accept the terms of the License agreement, and then click Next.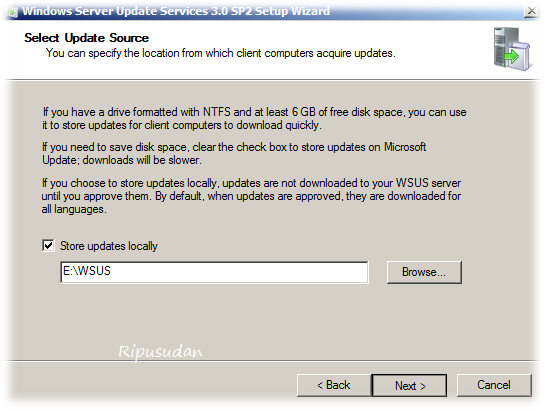
You can specify where clients get updates on the Select Update Source page of the installation wizard. By default, the Store updates locally check box is selected and updates will be stored on the WSUS server in the location that you specify. If you clear the Store updates locally check box, client computers obtain approved updates by connecting to Microsoft Update. So leave it default and then click Next.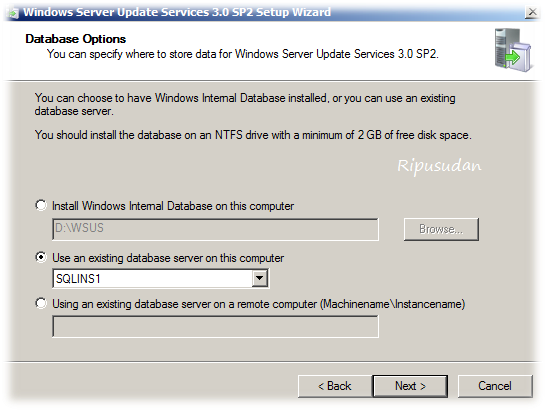
On the Database Options page, select the software that is used to manage the WSUS 3.0 database. By default, the installation wizard offers to install Windows Internal Database.
If you do not want to use Windows Internal Database, provide an instance of Microsoft SQL Server for WSUS to use by selecting Use an existing database on this server (if SQL is installed on your local system) or Use an existing database server on a remote computer. Type the instance name in the applicable box. The instance name should appear as \, where serverName is the name of the server and instanceName is the name of the SQL instance. Now go to Next.
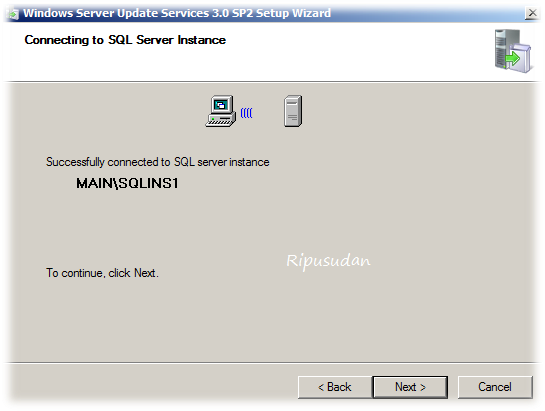
you have opted to connect to a SQL Server, on the Connecting to SQL Server Instance page, WSUS will try to connect to the specified instance of SQL Server. When it has connected successfully, click Next to continue.
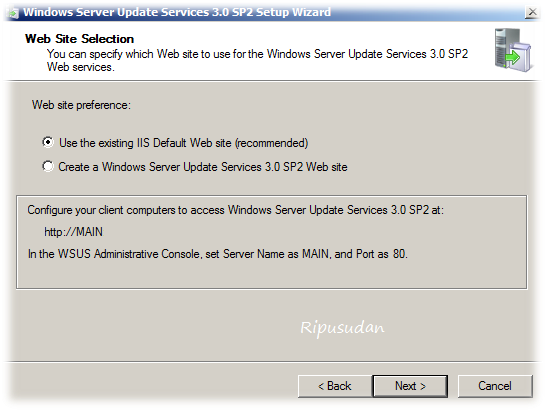
On the Web Site Selection page, specify the Web site that WSUS will use. If you want to use the default Web site on port 80 or 443, select Use the existing IIS Default Web site. If you already have a Web site on port 80, you can create an alternate site on port 8530 or 8531 by selecting Create a Windows Server Update Services 3.0 SP2 Web site. Click Next.
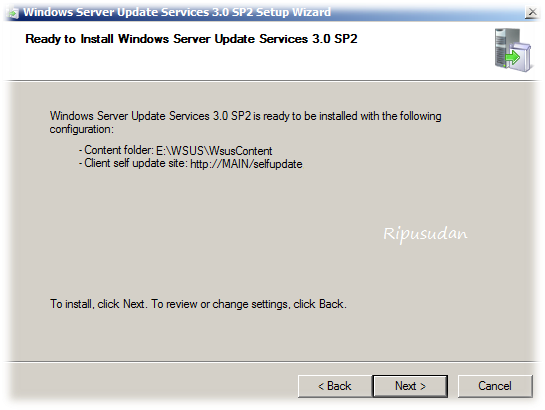
On the Ready to Install Windows Server Update Services page, review the selections, and then click Next.
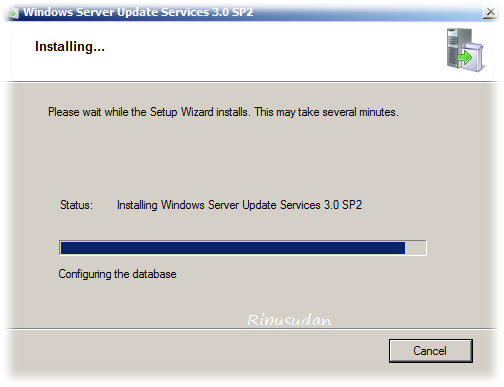
The final page of the installation wizard will let you know if the WSUS installation completed successfully. After you click Finish the configuration wizard will start.
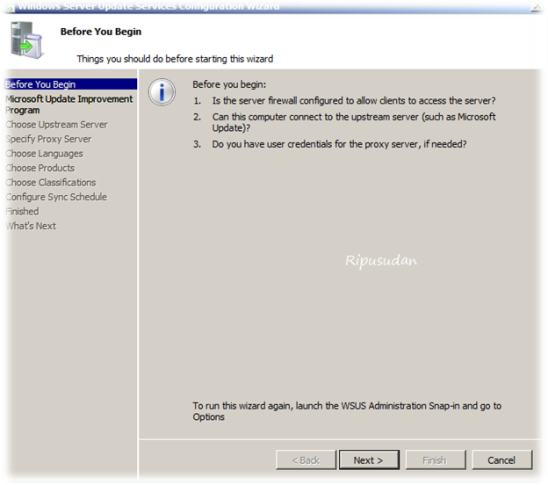
The before you begin page will show you three matters, you have to resolve these issues before begin configuration.
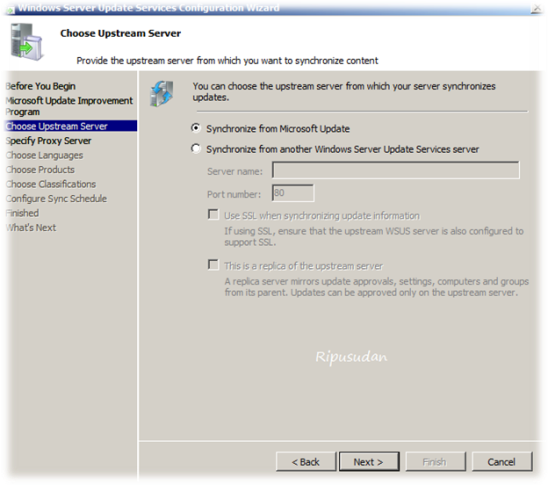
From the configuration wizard, after joining the Microsoft Improvement Program, click Next to select the upstream server.
If you choose to synchronize from Microsoft Update, you are finished with the Options page. Click Next, or select Specify Proxy Server from the navigation pane.
On the Specify Proxy Server page of the configuration wizard, select the Use a proxy server when synchronizing check box, and then type the proxy server name and port number (port 80 by default) in the corresponding boxes.
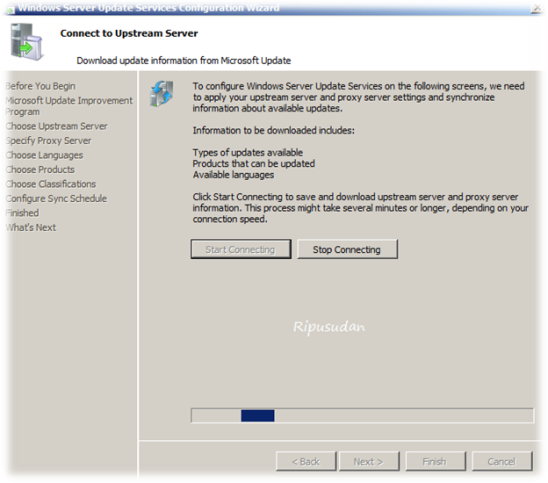
On the Connect to Upstream Server page click start connecting and wait until upstream server connection is processing.
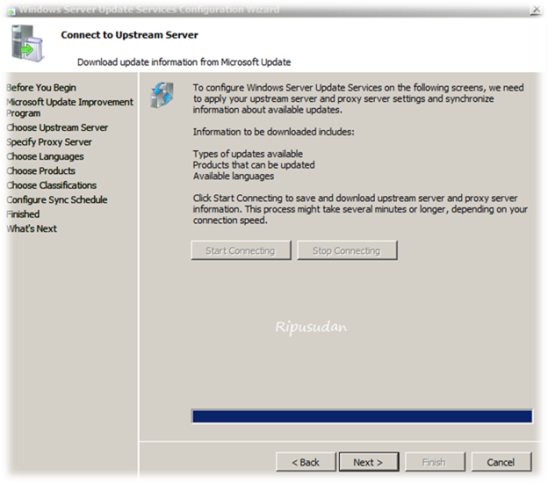
Now this server is connected to upstream server click next.
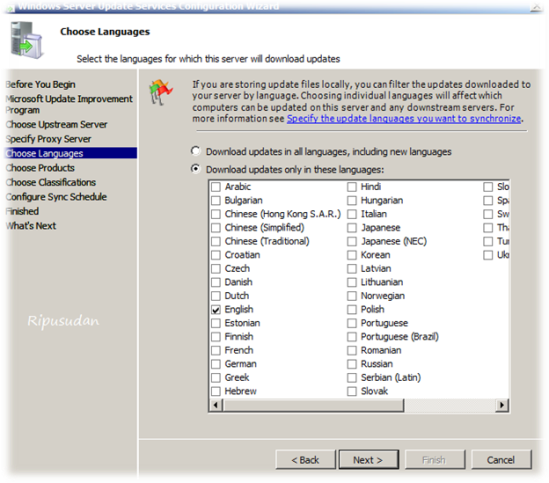
On the choose languages page select desired languages what your organization need and click next.
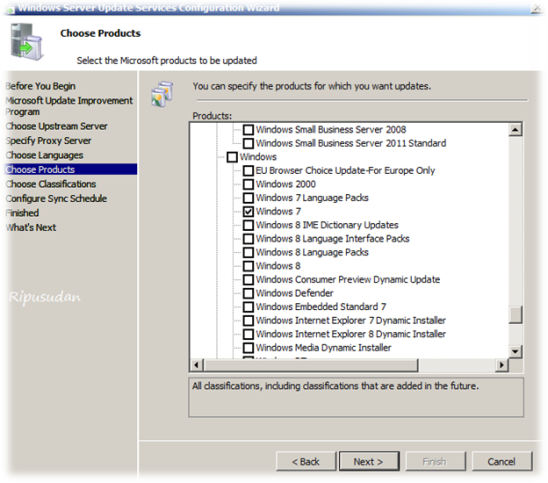
On the choose Product page select desired products those are deployed in your organization and click next. I chose win7 and server 2008.
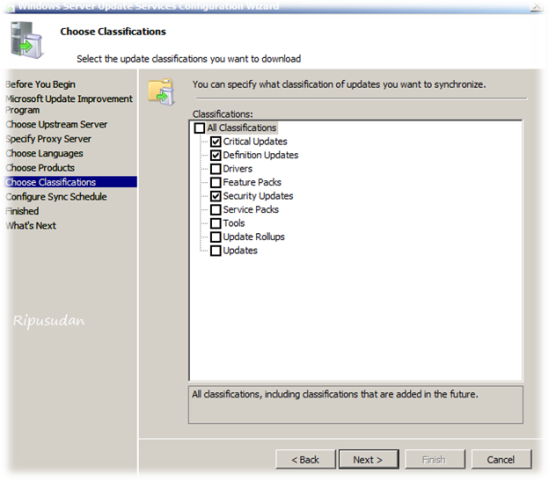
On the choose classifications page, select required kind of classifications and click next.
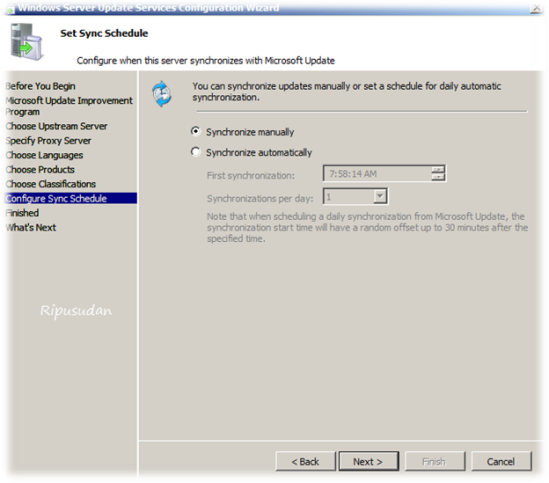
On the set synchronization page either you can choose synchronization manually or you can set a synchronization schedule, click next.
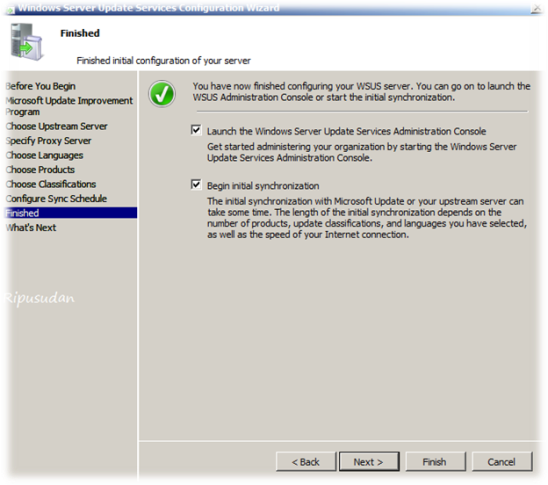
On the finished page choose both options to launch WSUS admin console and start initial synchronization. After you click Finish the WSUS administration console will open.
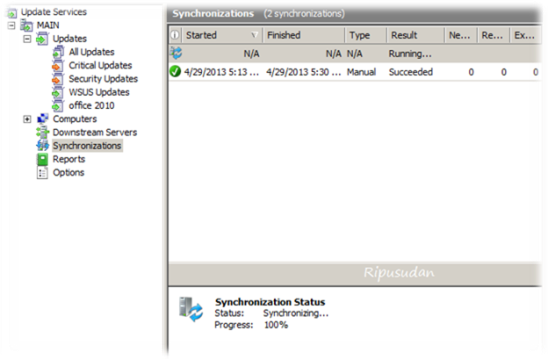
Now you can see your server is synchronizing with upstream server.
This will take several minutes depending your OS and Applications selection. So, Please wait until synchronization is processing.
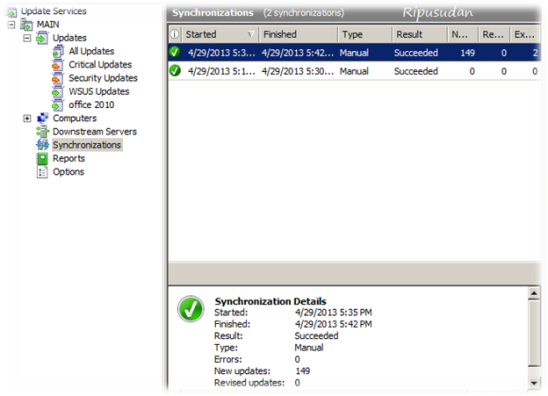
After synchronization finished, you will realize your update server is synchronized successfully from Microsoft update servers.
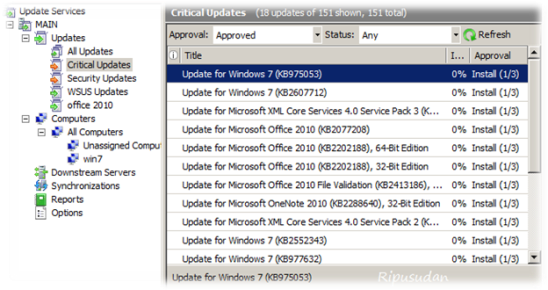
Now Expand ServerName(main)\updates\all update, you will see lot of updates are available for download. These updates need you approval to download on your server. First create computer groups to approve an update to a particular group.
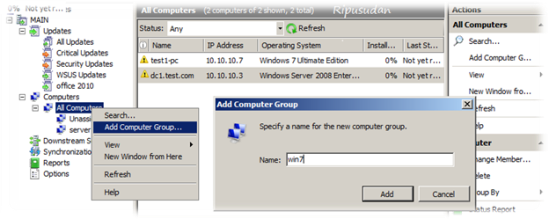
To create a computer groups expand ServerName\computers\all computers, right click on all computer and click add computer group, specify a name for the new group and then click add.
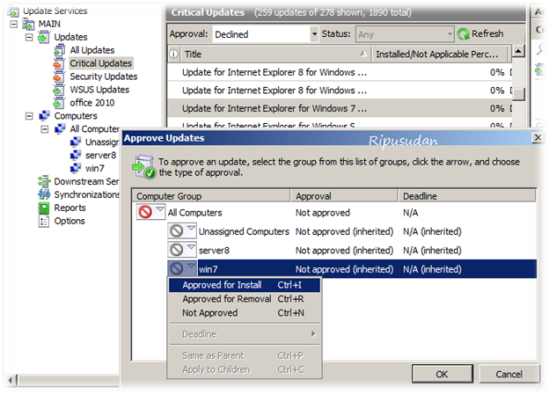
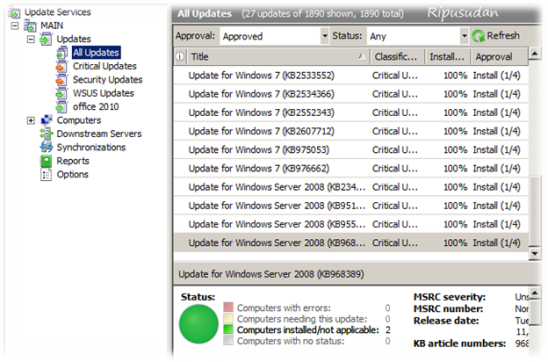
To approve updates to a group expand Servername\updates\all update, double click on an update the approve update page will open, select appropriate group in which this update belongs to and click approved for install, then click ok.
Configure
Client Updates:
The best way to configure Automatic Updates depends on the network environment. In an environment that uses Active Directory directory service, you can use an existing domain–based Group Policy object (GPO) or create a new GPO. In an environment without Active Directory, use the Local GPO.
(for older version of os first add wsus template in gpmc console by navigating computer configuration/administrative templates/rc/add-remove templates/add/ wuau.adm)
To point the client computers to the WSUS server, In the GPMC, expand Computer Configuration\Administrative Templates\Windows Components, and then click Windows Update.
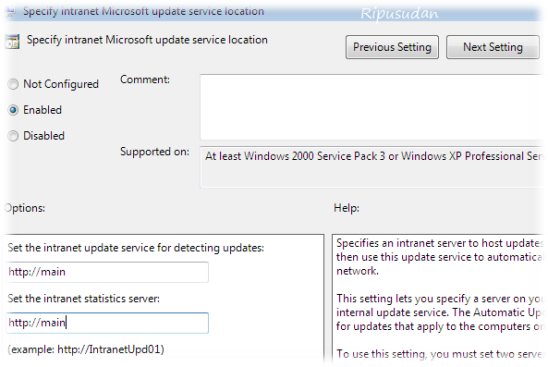
In the Windows Update details pane, double-click Specify intranet Microsoft update service location.
Click Enabled, and type the HTTP URL of the same WSUS server in the Set the intranet update service for detecting updates box and in the Set the intranet statistics server box. For example, typehttp://servername in both boxes, and then click OK. (I.e.: http://main)
To assign computer to the
specific group, In the Windows Update details pane, double-click Enable client
side targeting.
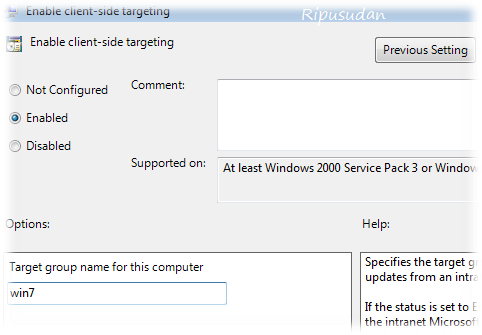
Click Enabled, and type the group name in the target group name for this computer box. For example, type win7, and then click OK.
Note:
If you are using the Local GPO to point the computer to WSUS, this setting takes effect immediately, and this computer appears in the WSUS Administrative Console after a short time, and the update takes about 20 minutes.
For client computers configured with a domain-based Group Policy, it can take about 20 minutes after Group Policy refreshes.
If you want to update Group Policy sooner, you can go to a command prompt on the client computer and type gpupdate /force.
If you begin detection manually, you do not have to wait 20 minutes for the client computer to contact WSUS. To manually start detection by the WSUS server, open CMD and type type wuauclt.exe/detectnow, or on Windows 7, Windows Server 2008, and Windows Vista systems, you can perform an interactive detection.
Now view update distribution
status:
After configuring client to install update automatically, client will check and install updates successfully.
You can verify which updates were installed or not using by update section under WSUS administration console as a snap shot given below.
After configuring client to install update automatically, client will check and install updates successfully.
You can verify which updates were installed or not using by update section under WSUS administration console as a snap shot given below.
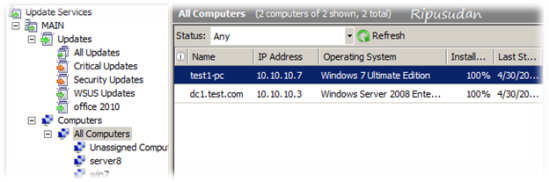
To know which computer has installed update or needs to be update, expand WSUS administration console\Servername\computers\All computer or group as a snap shot given below.
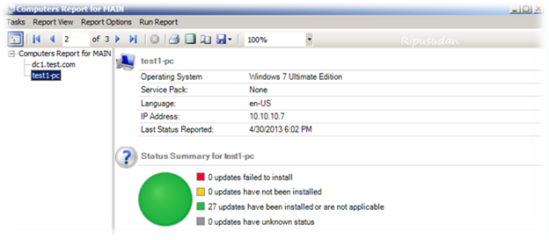
To know computers status, Expand WSUS administration console\ServerName\reports, in the Reports pane, under computer reports, click computer detailed status. After selecting desired options click run reports. Computer report will look like given below, which will show computer status in detail.
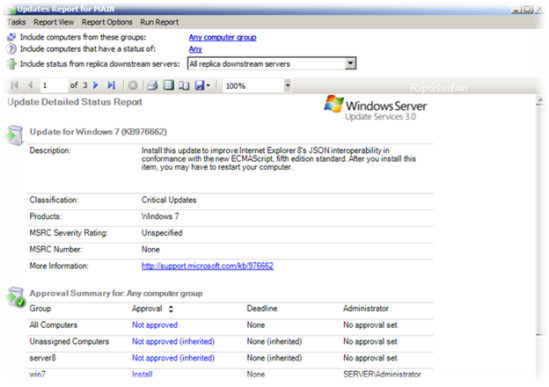
To know update status where it is applied or where not. Expand WSUS administration console\ServerName\reports, in the Reports pane, under update reports, click update detailed status. After selecting desired options click run reports. Update report will look like given below, which will show Update status in detail.
Update Report page 1st of 3:
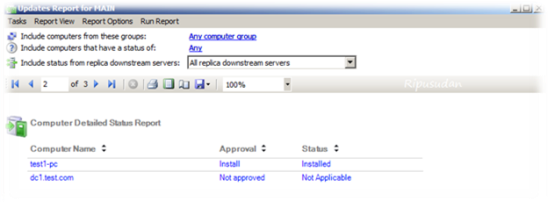
Update Report page 2nd of 3:
No comments:
Post a Comment